

How To Change Opacity In Adobe Animate
A well-done animated intro, logo, or graphic can exist a great addition to a video and brand it more engaging to your viewers. The keyword here is well-washed. A messy or poorly made animated graphic volition accept a distracting outcome on your audience that will hinder more than help.
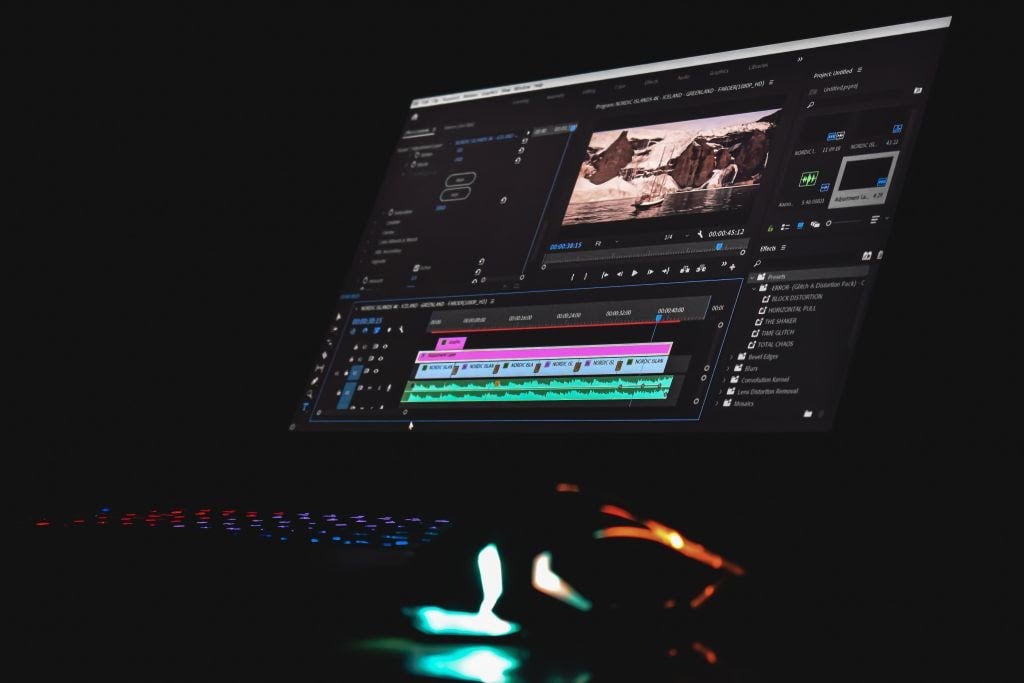
Adobe Premiere Pro CC is a great selection to choose for animative graphics. Although you may have to larn some of the ins and outs of the program at commencement, in one case you get a hang of information technology yous tin really brand an animated graphic that looks exactly the way you want it to. This tutorial will show you how to make some basic animations to a graphic so that you can use it to raise whatsoever video projection.
Setting Upwards Your Project for Motion Graphics
After opening a new project, yous'll want to create a sequence and prepare your sequence settings. Throughout this article, we'll exist using an case graphic, but go on in heed there are many means to practice things in Premiere, as in any editing software. So experience free to experiment with whatsoever of these steps.
Here'southward how to set upwards your sequence:
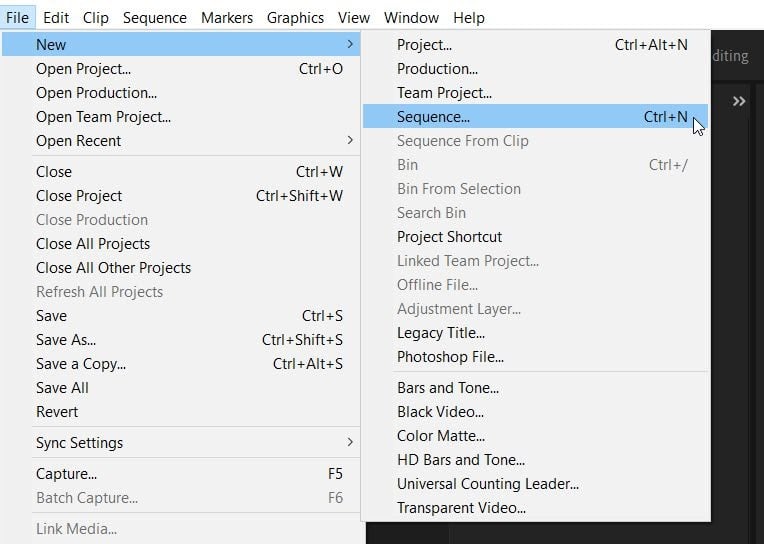
- Go to File > New > Sequence. A window will come upward where you can select sequence settings.
2. Choosing sequence presets usually depends on what kind of camera yous used to pic, but since we're making a graphic nosotros'll just choose the Standard 48kHz option under DV – NTSC.
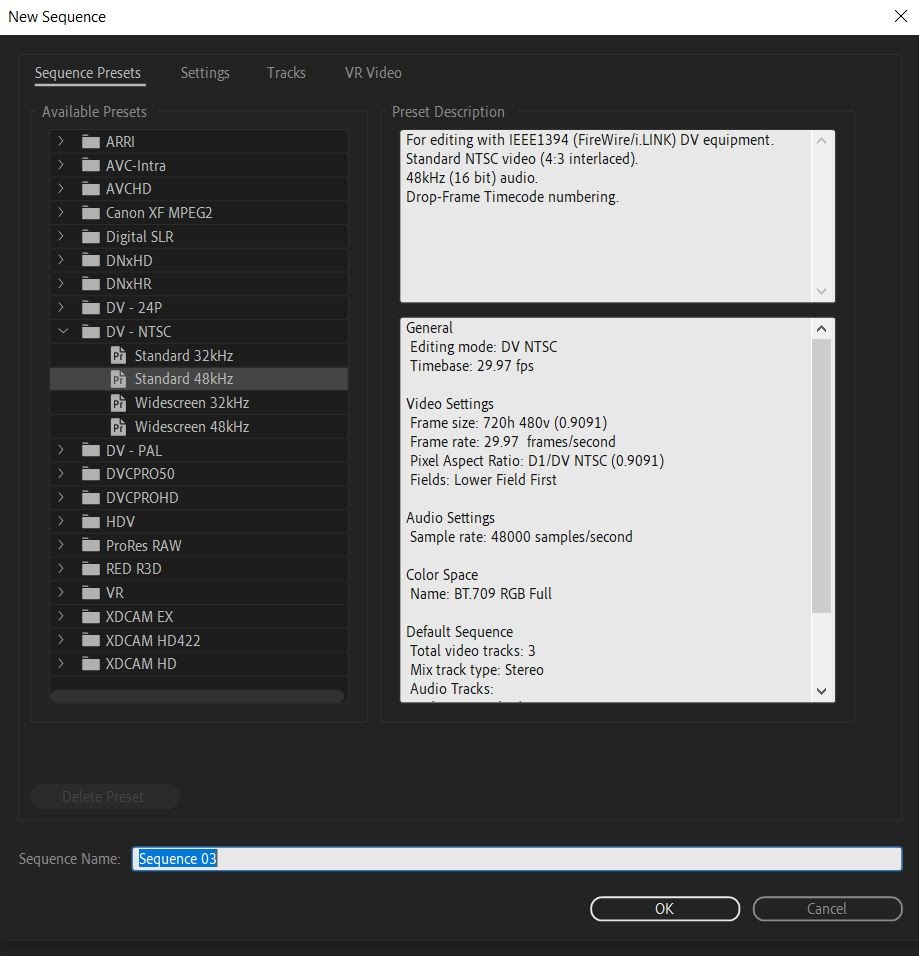
3. Later selecting your sequence settings, proper name your sequence and select OK. The new sequence will announced in your timeline and in your Project panel.
Now, you'll want to add in elements you'll be using for your graphic. This might exist your logo, or you lot can add together in some text from the Essential Graphics panel nether Graphics at the elevation. Text from the Essential Graphics console is pre-blithe, but you can alter them how you wish with fonts, colors, and animations.
First, we'll go over how to add in your ain original graphic, such as a logo.
- Go to the Media Browser and locate the file, and drag and drop information technology into your timeline. Alternatively y'all tin can elevate and drop files directly from the file explorer on your estimator.
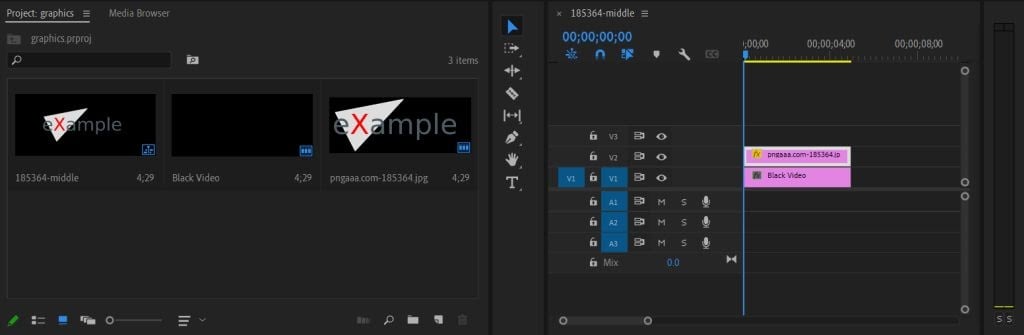
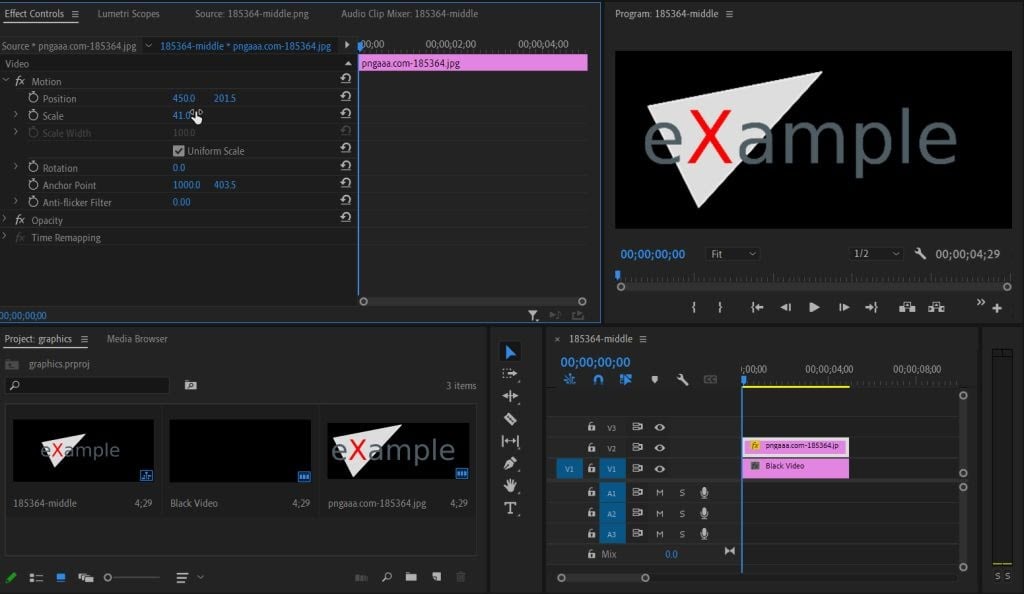
2. Now, drag the graphic/logo into your timeline. If the graphic is too big or likewise small, nosotros can ready this in the Effect Controls panel. Select the prune of the graphic in your timeline, and in Effect Controls locate the Scale option. Increase or decrease this value to fit the graphic to the video every bit you wish.
Hither's how to add together Essential Graphics text animations:
i. Go to Essential Graphics > Browse and find the blithe text you wish to use.
2. Select and drag it into your timeline. You tin click on the sample text to add your own text.
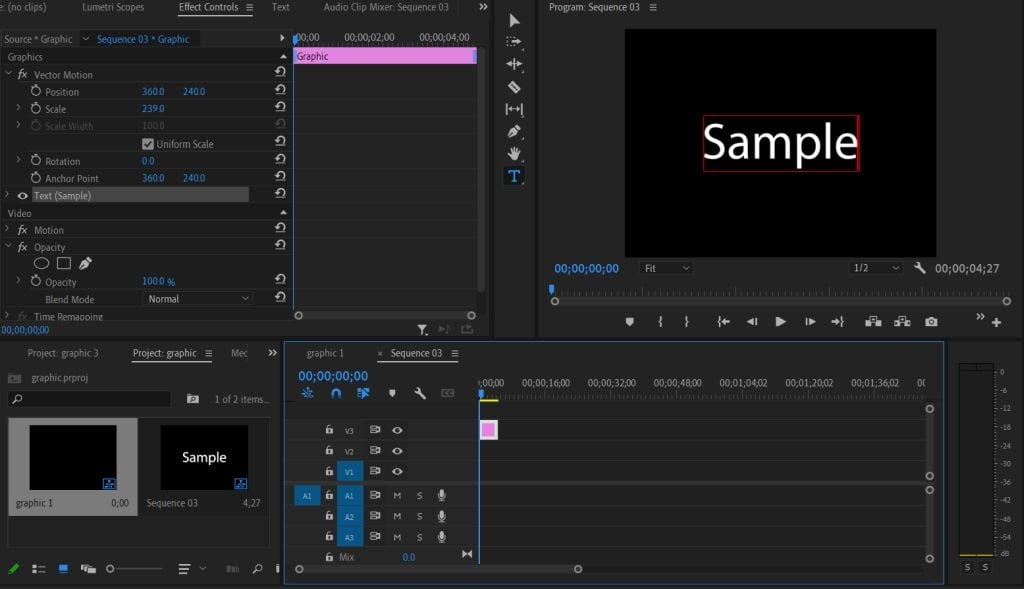
3. Yous tin can use the Effect Controls to edit the animations using the methods below with keyframes.
Animate and Customize Your Graphic
There are a few different ways you tin can go about animating a graphic. First, you tin can download presets to get furnishings past simply calculation them to your projection. Or, you tin use Effect Controls to breathing graphics yourself. This section will go over both methods.
To add together a preset to your project:
- Observe a preset on the cyberspace you'd like to use and download it somewhere yous'll think.
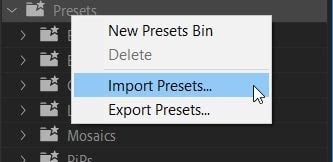
- In Premiere, go to Effects and correct-click on Presets. Select Import Presets, so in the file explorer find the preset you downloaded.
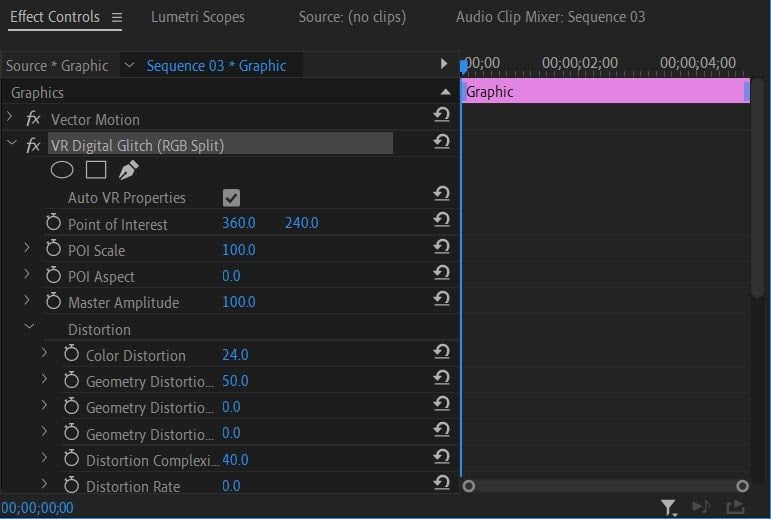
3. In one case imported, discover the preset yous'd similar to utilise in the Furnishings panel and drag it onto your graphic clip.
four. In the Effects Controls settings, you'll be able to edit the specific effects of your preset. You tin can do this past irresolute the values of each effect to get the result you want.
Now, maybe you lot desire to create an animated issue yourself. This can be done directly from Effect Controls. With this graphic we'll practice a unproblematic size increase animation.
- Find the effect or transition y'all desire to breathing with your text. In this case, we'll exist using the Calibration upshot under Movement effects. Y'all could also animate effects similar Opacity, Position, or Rotation.
- Gear up the upshot value to where yous'd similar the blitheness to start. We want the graphic here to start small-scale, so change the Calibration value to 0.five. Gear up a keyframe by clicking on the stopwatch.
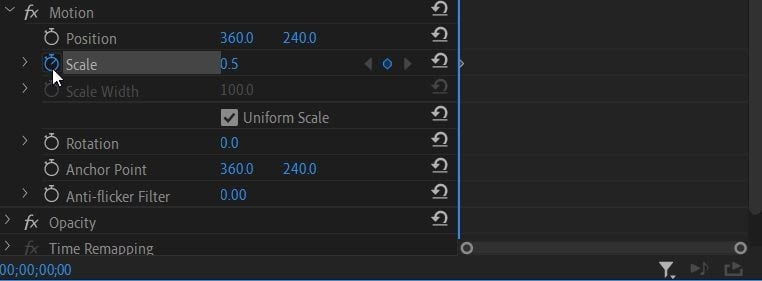
three. Now, move to a point in the video where you'd similar the effect to exist changed. Since we desire to increase the size of the graphic over fourth dimension, we'll move the timeline cursor to where we desire the animation to terminate and set the Calibration value to the largest size we want it to exist. A new keyframe will automatically exist prepare.

4. The blitheness will happen automatically as the video moves from one gear up keyframe to the adjacent. You can change these keyframes or upshot values even so y'all want until you achieve your desired outcome.
At present, play your video back to ensure that the blitheness looks the way you lot'd like. If so, y'all can export your project. If you wish, yous can also try editing your graphic in Adobe After Effects to go fifty-fifty more than control over how it looks.
Animating Graphics in Adobe Premiere Pro
Although it may seem intimidating at first, creating an animated graphic using Premiere can be learned chop-chop. Afterward following this video editing tutorial you'll have an impressive, professional-looking animated graphic to take your videos to the next level.
Exercise non share my Personal Data.

Source: https://www.online-tech-tips.com/computer-tips/how-to-animate-graphics-in-adobe-premiere-pro/
Posted by: angcounts.blogspot.com
0 Response to "How To Change Opacity In Adobe Animate"
Post a Comment